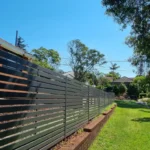
Pallet planter boxes are a sustainable and cost-effective way to create garden spaces using recycled wooden pallets. They are particularly popular in Australia, where individuals value eco-friendly practices and often face limited garden space.
These projects are ideal for beginners. They feature simple designs that can be adapted for various needs, such as herbs or flowers, using pallet planter boxes.
The appeal lies in sustainability, as repurposing pallets reduces waste and promotes recycling, aligning with Australian environmental values.
Cost-effectiveness is a key benefit. Pallets are often available for free or at a low cost from local businesses such as supermarkets, warehouses, or factories.
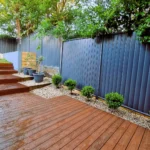
Versatility allows for a range of designs, from basic pallet wood planter box units to vertical gardens, fitting diverse spaces. Customisation options, such as painting or adding compartments, cater to personal style, making these projects engaging for beginners.
Safety is critical, and research recommends using heat-treated (HT) pallets, marked with “HT,” to ensure they are safe for gardening. Avoid pallets marked “MB,” indicating methyl bromide treatment, which is toxic and unsuitable for plant contact.
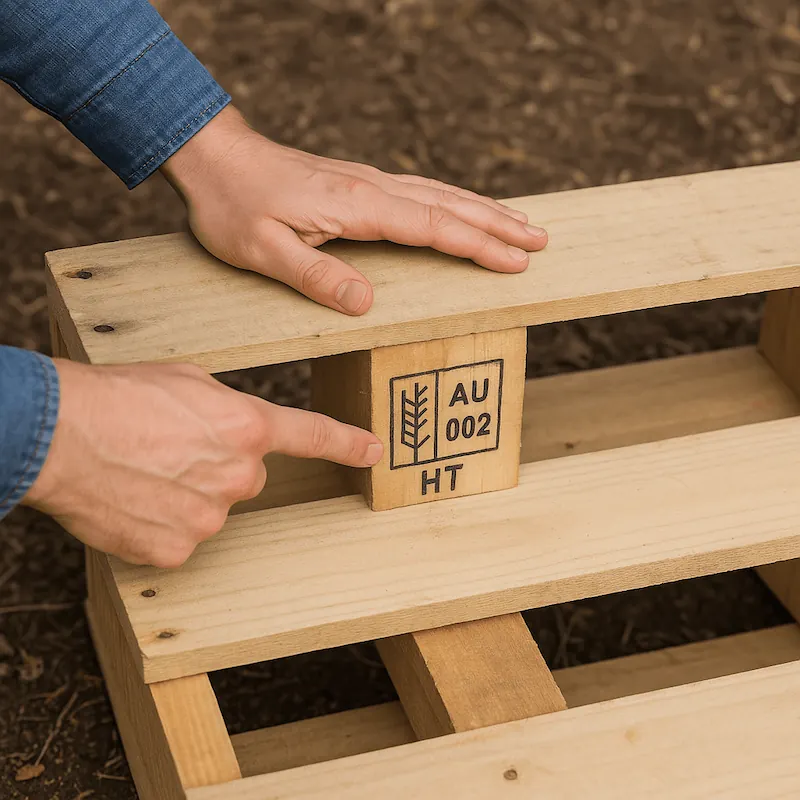
This is significant in Australia. Regulations and environmental considerations are highly regarded, ensuring the wood does not harm plants or the ecosystem. For instance, pallets can be inspected at local hardware stores like Bunnings for safety markings.
Project 1: Basic Pallet Planter Box
Build time: Under 1 hour
Skill level: Beginner
Perfect for: Herbs, flowers, or small veggies
Tools & Materials:
- 1 heat-treated (HT) wooden pallet
- Saw or jigsaw
- Hammer
- Nails or screws
- Sandpaper
- Plastic sheeting
- Optional: Outdoor paint or wood sealant
Step-by-Step Instructions:
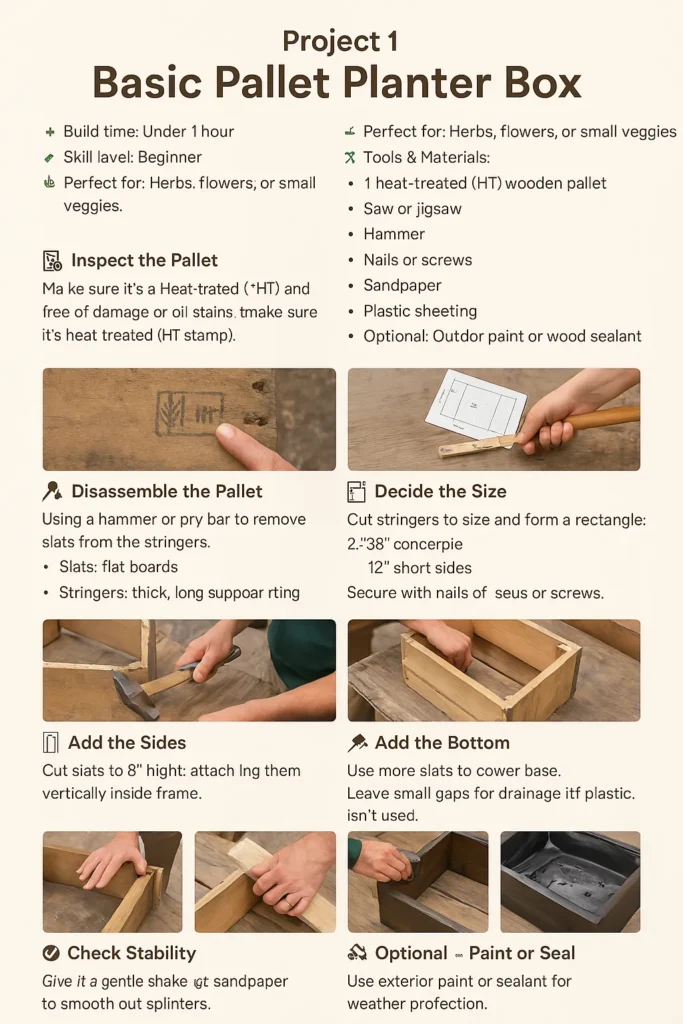
🔍 Step 1: Inspect the Pallet
Make sure it’s heat-treated (look for “HT” stamp), clean, and free of damage or oil stains.
🪚 Step 2: Disassemble the Pallet
Use a hammer or pry bar to remove the slats from the stringers.
- Slats = flat boards
- Stringers = thick, long supporting pieces
📏 Step 3: Decide the Size
Plan your planter dimensions (e.g. 36″ long × 12″ wide × 8″ high).
🧱 Step 4: Build the Frame
Cut the stringers to size and form a rectangle:
- 2 × 36″ (long sides)
- 2 × 12″ (short sides)
- Secure with nails or screws.
🪵 Step 5: Add the Sides
Cut slats to 8” height and attach them vertically inside the frame.
🪓 Step 6: Add the Bottom
Use more slats to cover the base. Leave small gaps for drainage if not using plastic.
🔧 Step 7: Check Stability
Give it a gentle shake. Tighten any loose screws/nails.
🪵 Step 8: Sand Rough Edges
Use medium to fine-grit sandpaper to smooth out splinters.
🎨 Step 9: Optional – Paint or Seal
For weather protection, use exterior paint or sealant.
🌿 Step 10: Line with Plastic
Add plastic sheeting inside to protect the wood. Punch drainage holes at the bottom.
🌼 Step 11: Fill and Plant
Add soil and choose plants. Marigolds are a great low-maintenance choice for Aussie gardens!
✅ Done!
You’ve now created a simple, sturdy, and eco-friendly pallet planter box from a single pallet. Perfect for balconies, patios, or gardens.
Project 2: Skid Planter Box for Herbs
Build time: Under 1 hour
Skill level: Beginner
Perfect for: Small herb gardens on balconies or patios
Tools & Materials:
- 1 heat-treated (HT) wooden skid
- Saw or jigsaw
- Hammer
- Nails or screws
- Sandpaper
- Small containers or wood dividers
- Optional: Outdoor paint or wood sealant
Step-by-Step Instructions:
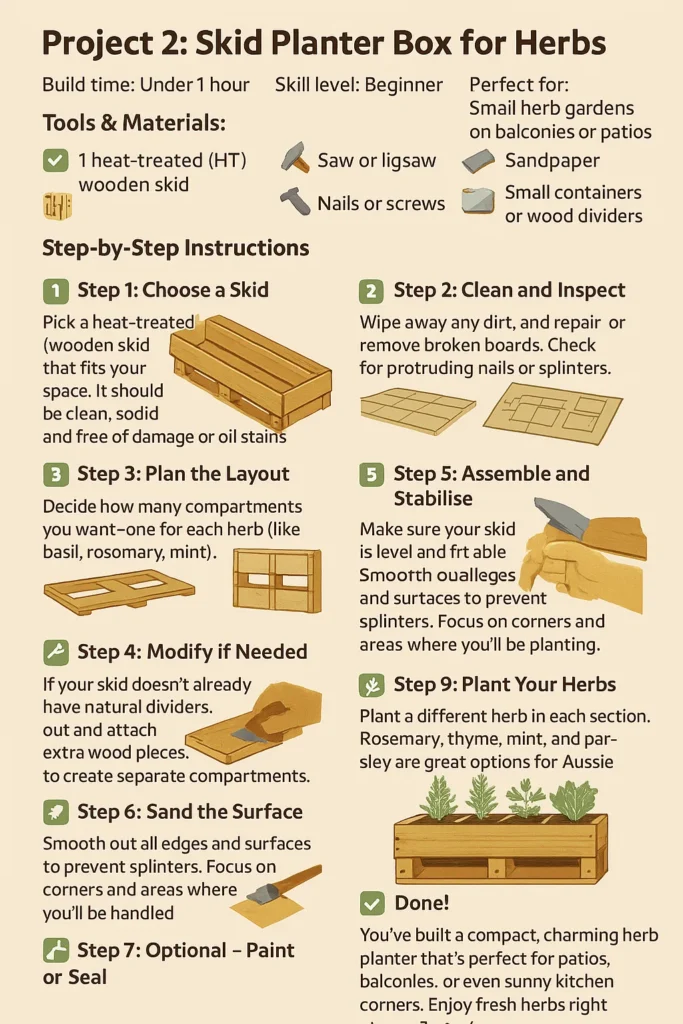
🔍 Step 1: Choose a Skid
Pick a heat-treated (HT) wooden skid that fits your space. It should be clean, solid, and free of damage or oil stains.
🧼 Step 2: Clean and Inspect
Wipe away any dirt, and repair or remove broken boards. Check for protruding nails or splinters.
📐 Step 3: Plan the Layout
Decide how many compartments you want—one for each herb (like basil, rosemary, mint). Sketch your layout and think about how you’ll divide the space.
🪚 Step 4: Modify if Needed
If your skid doesn’t already have natural dividers, cut and attach extra wood pieces to separate compartments. This keeps each herb in its own cozy space.
🧱 Step 5: Assemble and Stabilise
Make sure your skid is level and stable. Reinforce with nails or screws if needed, especially if you’ve made modifications.
🪵 Step 6: Sand the Surface
Smooth out all edges and surfaces to prevent splinters. Focus on corners and areas where you’ll handle the planter.
🎨 Step 7: Optional – Paint or Seal
To make it weather-resistant and add some personality, apply outdoor paint or sealant. Let it dry completely before planting.
🪴 Step 8: Add Soil Compartments
If you’re using small containers, place them securely into each section. Otherwise, line each compartment with landscape fabric or a bit of breathable plastic and add potting mix.
🌿 Step 9: Plant Your Herbs
Plant a different herb in each section. Rosemary, thyme, mint, and parsley are great options for Aussie climates—sun-loving and space-saving!
✅ Done!
You’ve built a compact, charming herb planter using pallet planter boxes, perfect for patios, balconies, or sunny kitchen corners. Enjoy fresh herbs right at your fingertips!
Project 3: Vertical Flower Boxes from Pallets
Build time: 1–2 hours
Skill level: Beginner–Intermediate
Perfect for: Trailing flowers, vines, small urban gardens
Tools & Materials:
- 1 heat-treated (HT) wooden pallet
- Screws or nails
- Drill
- Hammer
- Staple gun
- Plastic sheeting or landscape fabric
- Potting soil
- Trailing flowers or vines (e.g. petunias, ivy, lobelia)
- Optional: Hooks or wire (for hanging pots)
Step-by-Step Instructions:
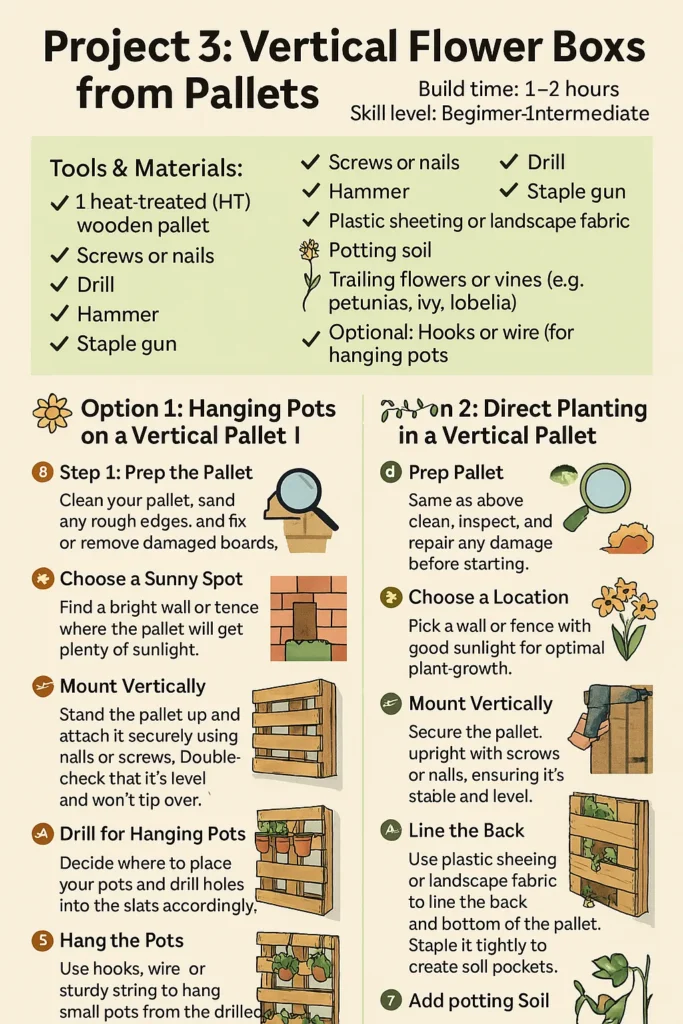
🌼 Option 1: Hanging Pots on a Vertical Pallet
🔍 Step 1: Prep the Pallet
Clean your pallet, sand any rough edges, and fix or remove damaged boards.
☀️ Step 2: Choose a Sunny Spot
Find a bright wall or fence where the pallet will get plenty of sunlight.
🧱 Step 3: Mount Vertically
Stand the pallet up and attach it securely using nails or screws. Double-check that it’s level and won’t tip over.
🛠️ Step 4: Drill for Hanging Pots
Decide where to place your pots and drill holes into the slats accordingly.
🪴 Step 5: Hang the Pots
Use hooks, wire, or sturdy string to hang small pots from the drilled holes.
🌿 Step 6: Add Flowers
Fill each pot with potting mix and plant trailing flowers like ivy, petunias, or nasturtiums.
💧 Step 7: Care & Maintain
Water regularly and trim plants as needed to keep them healthy and cascading beautifully.
🌿 Option 2: Direct Planting in a Vertical Pallet
🔍 Step 1: Prep the Pallet
Same as above—clean, inspect, and repair any damage before starting.
☀️ Step 2: Choose a Location
Pick a wall or fence with good sunlight for optimal plant growth.
🧱 Step 3: Mount Vertically
Secure the pallet upright with screws or nails, ensuring it’s stable and level.
🧵 Step 4: Line the Back
Use plastic sheeting or landscape fabric to line the back and bottom of the pallet. Staple it tightly to create soil pockets.
🌱 Step 5: Add Potting Soil
Fill the gaps between the slats with potting mix, packing it in firmly.
🌼 Step 6: Plant the Flowers
Tuck your trailing plants or vines directly into the slat openings.
🔧 Step 7: Check Stability
Make sure the pallet is secure enough to hold the weight of the soil and plants. Consider wind conditions, especially outdoors in Australia’s variable climate.
💧 Step 8: Water & Prune
Water gently, let the plants settle, and trim as needed to keep growth tidy and lush.
✅ Done!
You’ve turned a simple pallet into a space-saving, eye-catching vertical flower garden using pallet planter boxes. Ideal for balconies, fences, and small backyards—and easy to customise with Aussie-native trailing blooms.
Conclusion and Encouragement
Creating pallet wood planter box designs combines sustainability with creativity, offering beginners in Australia a range of projects from basic to decorative.
These designs cater to different needs, including space-saving vertical gardens and tiered pallet planter boxes for various plants. This ensures they are practical and engaging.
Start today, utilising local resources like Bunnings for materials, and enjoy watching your garden flourish.
Comparison of Pallet Planter Projects
| Project Type | Complexity Level | Space Suitability | Estimated Time | Key Materials | Primary Use Case |
| Basic Pallet Planter Box | Low | Ground/Balcony | ~1 hour | Pallet, nails, soil | Vegetables, flowers |
| Skid Planter Box for Herbs | Low-Medium | Balcony/Patio | ~1.5 hours | Skid, dividers, soil | Herb gardens |
| Vertical Flower Boxes | Medium | Wall/Fence | ~2 hours | Pallet, fabric, pots | Trailing flowers |
Frequently Asked Questions (FAQs)
Where can I find wooden pallets in Australia?
Wooden pallets are commonly available from businesses like supermarkets, warehouses, or local hardware stores. Many will provide them for free, while others may charge a small fee.
How can I tell if a pallet is safe for gardening?
Look for the “HT” stamp, which indicates the pallet has been heat-treated and is safe to use for pallet planter box projects. Avoid pallets with the “MB” stamp, as they contain chemical treatments that may not be safe for gardening.
Can I use any type of paint on my planter box?
Using outdoor paint designed for wood is recommended. It withstands weather conditions and provides long-lasting protection for your pallet wood planter box.
What kind of plants are best for each type of planter?
- Basic planters: Vegetables like tomatoes or flowers like marigolds.
- Herb planters: Basil, mint, and rosemary thrive well.
- Vertical planters: Trailing plants like petunias or ivy work great for these.
How do I maintain my pallet planter box?
- Regularly inspect for damage or signs of rot.
- Repaint or reseal the pallet planter boxes as needed for protection.
- Ensure proper drainage to prevent waterlogging, which can harm the plants.
This guide covers all necessary details, making it straightforward for readers to begin their pallet planter box for sale journey.